Create a Custom Link
Admins can add up to 10 custom links to your Kapost instance to create a link to a key external site or resource. Your custom links will be added to your top navigation bar where all your instance members can access it. The links let your teams navigate to your organization's crucial information sources from Kapost, like a brand asset or an internal tool.
Best Practices
Think about resources or sites that will be valuable to all the teams in your Kapost instance. For example, at Kapost we have a custom link for our internal style guide that, among other things, is an overview of our taxonomy and helps us choose the right custom fields to complete on content types.
Some users set up a custom link to an internal help site to provide their instance members with a fast way to find answers to their questions or contact their support team.
Custom Link Set Up
-
On the Dashboard, click the Settings icon and select General.
-
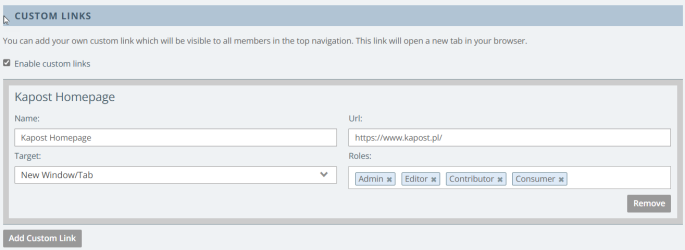
Scroll down to the Custom Links section and select the Enable custom links checkbox.
-
Click the Add Custom Link button that is displayed.
-
Enter the Name that is displayed for your link (for example, 'Style Guide') and the relevant URL.
Note: The length of the name must not exceed 24 characters.
-
In the Target field, select one of the following options from the drop-down menu:
-
New Window/Tab - Displays the custom link tab on the top navigation bar and opens the link in a new tab or window
-
Embedded - Displays the custom link tab on the top navigation bar and opens the link within the Kapost app
-
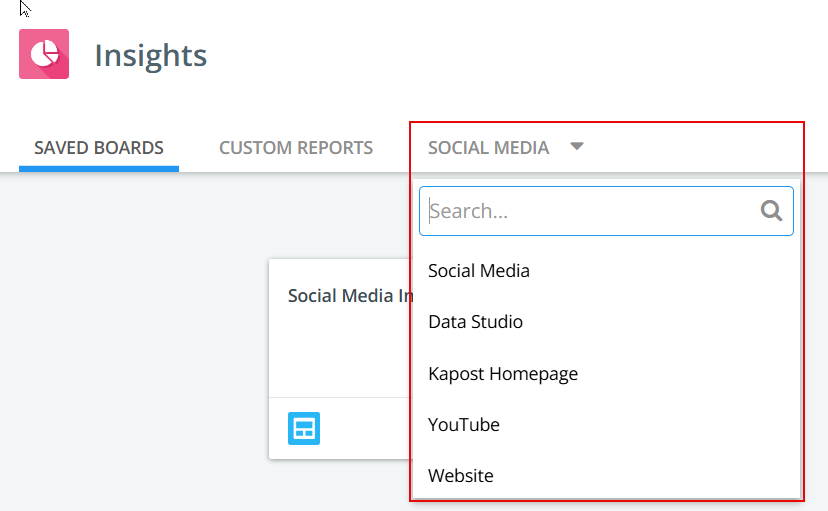
Insights - Displays the custom link tab on the Insights page and opens the link within the Kapost Insights app
Note: To enable the Target field in your instance, reach out to your CSM.
-
-
In the Roles field, select one or more roles from the drop-down menu to restrict access to the custom link tabs.
Note: If you select "Insight" as the target, the Consumer role will be disabled for selection, as the Insights app is not applicable for this role.
-
To add more links, click the Add Custom Link and repeat steps 4-6 for each link that you want to add to your Kapost instance.
-
Click the Save Changes button at the bottom of the page to save your new custom link(s).
-
If you select New Window/Tab or Embedded as your targets, the custom link(s) will be visible to the selected role(s) in the top navigation bar. If multiple custom links are added, a drop-down menu will display all the links.

-
If you select Insight as your target, the custom link will be visible to the selected role(s) as a tab in the Insights page. If multiple custom links are added, a drop-down menu appears, with links opening within the Insights page.

-
